Games Making

Games Making: Learning about games by designing them

Kids seem to make up their own games all the time. My kids are always scripting their play – imagine you say this and then I’ll go over here and do this and then we can do that. Yeah, but when that happens I’ll do this and then you can do that – and they play merrily along in their fantasy games of shop-keeper and customer or mum, dad and little dog. Yet as they get older we (as adults) work to formalise these games and take away the bits that made it fun in the first place.  We also create the rules and parameters for engagement and base these on that we think will be fun or what has proven to be fin in the past. I guess games-making, for me, is about inviting kids back to their imaginations and re-engaging with their willingness to experiment and adapt and make their own fun.  

The process of games-making can lead to a game that is as complex as a game of cricket (easy if you know how but baffling if not) or as simple as tic tac toe. As a teacher if is possible can provide them with a ‘blank sheet of paper’ on which to create their games or set a number of closed questions were they fill in the blanks. The latter is easier but their imagination is constrained by the limitations set by our questions. Confused. I will try and explain in two examples taken from my teaching.

Closed Question

Using the example of tig (or tag) a ‘closed’ session of games making might revolve around setting the parameters of the game i.e.

  1. How do you tig/tag?
  2. How do you un-tag?
  3. Where are the safe zones?
  4. What area are you playing in?

The answer to these questions (and any others you can think of) define the game and the students can then play and modify as you feel is best.

Open Question

In another example I asked the students to create an invasion game (i.e one where you invade your opponents hard and try to score in or over a fixed target or line). They need to define the game by answering three main questions:

  1. How do you score?
  2. How do you progress (i.e. pass and move)?
  3. How to you keep possession?

Once these were considered students then needed to work out the defensive alternatives to these questions i.e. how do you stop the opposition scoring? How do you gain possession? How do you stop them progressing? By working around and through these six key questions the game was created. This involved the pitch, the rules, the equipment etc. all of which initially define ‘the game’ and all of which are open to interpretation, modification, refinement or abandonment. 

In my experience both of these types of question (open or closed or indeed ajar or nearly open) led to the end result of game – one never before played by anyone else. In other words the kids end up making a game that didn’t exist before you asked the question. Fundamental it is a rudimentary game that lacks polish or perhaps even a workable concept but that doesn’t matter. Just like American Football, Tennis and Basketball all had to start somewhere before being polished, so ‘tickle tag’ and ‘Flash Ball’ have to start somewhere. The real challenge (and the reason why this can be done across a number of lessons/sessions) is that act of refinement is key to the learning process. My teaching suggests that this is where kids learn about the importance of rules, of the type of ball, of the pitch and where they invent their own tactics and strategies to win and not to lose. Subsequently this leads to new rules to stop rival teams playing outside the intended ‘aims’ of the game. The continuous toing and froing is key to games making and affords the students both a real sense of ownership but also a deep understanding of games. So next time you are thinking of an activity for your students let them make the next game you decide to play.

Bio: Ashley Casey, PhD, is a former high school physical education teacher who explored his own teaching through his doctoral research and beyond. He can be found on twitter as @DrAshCasey where he often heard talking about #physed with fellow #pegeeks.

Jump Rope for the Heart – Merton Schools

Merton Physical Education

Jump Rope for the Heart

Jump Rope for the Heart

Our 2012 JRFH event is scheduled for February 24th, 2012.  If you are wondering what it will look like watch the video below.  This was an event from 2010.  Lots of exercise and tons of fun!

Jump Rope Skills Video Series

Here are the videos you need to progress through your  jumping skills.  This is perfect exercise for the winter months.  Even practicing 5 minutes a day will give you many health benefits.  It’s fun and easy to do anywhere!  Have mom and dad dust off their old jump rope and join you too!  What a great way for a family to exercise together.  Have fun and enjoy your daily jumping!

Don’t forget….Persevere….you can do it!!

Just like we have talked about at school….keep trying….Persevere and you will see success!

Jump Rope Series – Video #1 – Beginning Forward Jump

Jump Rope Series – Video #2 – Forward and Backward Jumps – Single rope turns

Jump Rope Series – Video #3 – Single & Double Forward and Backward Jumps

Jump Rope Series – Video #4 – The Skiier

Jump Rope Series – Video #5 – The Bell

Jump Rope Series – Video #6 – Switch Kicks

Jump Rope Series – Video #7 – One Foot Hops

Jump Rope Series – Video #8 – Running in Place

Jump Rope Series – Video #9 – Froggers

Jump Rope Series – Video #10 – Spinning

Jump Rope Series – Video #11 – The Cross

Jump Rope Series – Video #12 – The Backwards Cross

Jump Rope Series – Video #13 – The Power Jump

Jump Rope Series – Video #14 – Side / Side / Jump

If you are looking for some more advanced jump rope skills you can also check here.  Mr. Sickler has a wonderful web page with many other advanced skills for upper elementary students.  My site was inspired by what he is doing in California!  Keep up the good work Mr. Sickler!

Partner Jumps – Fun Family Jumps

Jump Rope Series – Video #15 – Partner Jumps

Jump Rope Series – Video #16 – Partner Turns

Jump Rope Series – Video #17 – Partner Turn & Jump

Jump Rope Series – Video #18 – Long & Short Rope

Lucky Duck School

Here are some of the ducks your can earn if you raise money for the American Heart Association.  Here is a link to the other  thank you gifts that you can receive if you raise money for Jump Rope for the heart.  Thanks You Gifts.  Because of the past generosity of Merton Schools we were chose to be a lucky duck school and earn some extra incentives!  Thanks for all your past, present, and future help!  We are here to raise awareness and save lives!!  Get off the couch and JUMP!

We are a lucky duck school

Merton Physical Education Boot Camp

Merton Boot Camp

Merton Boot Camp Obstacle Course

Are you

Well it’s been a great 3 weeks of “Boot Camp” at Merton Intermediate School! The unit choice was Basketball or Bootcamp. What lucky kids to have a choice like that! It was a pretty even split between the two units, but I believe bootcamp had a few more signed up than basketball. It worked out well for both groups though! I was lucky enough to get to teach our boot campers! They were amazing throughout the whole unit!

I have a pretty extensive fitness background, because I have tried and participated through many different fitness classes and videos. I also like watching fitness videos on YouTube, so most of the fitness workouts came from something I have seen or done. I did find a great teaching tool and an awesome app that also gave me some ideas for specific workouts! Check it out here it’s called Nike Training Club.

Little Theatre

Our first day of class I had them all work in the little theatre and the workout was led by me! We did a modified workout from the Nike Training Club app and I modified it so it would work for my age group of kids. We started with a couple minutes with jump ropes to get their heart rate elevated and the the workout was set up as a circuit fitness workout, meaning I had them doing exercised for 30 seconds to 1 minute and then doing a different workout. The other focus for the class was to get into different heart rate training zones and we took our heart rates 3 or 4 different times during class! This was great to see the kids do! They worked so hard and i was impressed with the effort they put into it for the whole period!

Here is the list of exercises we did on the first day

First Workout

Day #2

We started in the little theatre and did about 10 minutes of warm up and specific strength activities. I broke my classes down to groups of 4 to 5 kids and gave them a card that had their workouts on them which told them what order and where to go! Everything today was done on a piece of playground equipment at the primary school or intermediate school. Here is the YouTube video I showed them for the directions of the workouts.

Day #3

Just like Day #2 we started indoors and did about 10 minutes of warm ups and that had a focus on core and then I showed another YouTube video on their new outdoor boot camp stations. Here is the video and the stations!

Day #4

Because of inclement weather we had to stay inside today. I decided on having my students do another circuit fitness workout. This workout was shared with me from a colleague on Twitter! Thanks @MrBridge204! I also used another app for today. I downloaded Interval Timer Pro Application from the Apple App Store. This application was great, because it allowed me to play music through iTunes and also have a timer on the big screen in the little theatre, so the kids knew when the minute of exercise was up. Then it had a recovery time set at 20 seconds, so they could rotate to their new workout. The workouts were posted on the walls, so the kids could see what to do. The effort and intensity level was awesome! I was so proud of how hard everyone worked!

Day #5

We started in the little theatre again with 10 minutes of warm ups and then went outside through our different stations. Here is what I had my students working on today.

Station #1

Station #2

Station #3

Station #4

Day #6 Indoor Stations – Watch video below or download the station sheets here Indoor Boot Camp Stations

That’s it! It was a lot of fun and the kids had a blast and worked really hard! This was good for both the boys and girls in class. Let me know if you have done anything like this or if you are interested in trying this too! It was great!

Break Down The Gym Walls

It’s Time to Break Down The Gym Walls!

Lets start with a little background on Merton Schools and the physical education department there!  Three years ago we were struggling with some double classes of 7th and 8th graders and there was no other option for scheduling their classes.  Our head “coach” or principal Jay Posick (you can read his blog here) gave us a thought on using different spaces we have inside and outside our school for our physical education classes.  The idea was how can we use these different spaces to engage more kids and keep kids fit and still have double classes.  We are lucky enough to be able to have two teachers with a group of 50 + students!

My coworker and I sat down after our meeting and thought up of a plan to give our two classes choices during each unit (2-3 week time period).  We challenged ourselves to come up with new and different choices for the kids to participate in, along with the traditional physical education or sport choices.  We knew that some students loved having the traditional physical education units, but also knew that there were many other students that were looking for new challenges and choices for their physical education class.

We came up with quite a few ideas!  Here was our game plan.  We tried to pair up traditional team sports with fitness activities or more individual games.  We also looked at setting up competitive activities with more cooperative activities, because we needed to have ideas that all students would enjoy!  We also were focused on making two even groups of kids!  We didn’t want lopsided units, because we knew that wouldn’t work!

Here was our first shot at unit choices!  This is from last year!

Merton 2010-2011 Unit Choices

Our unit choices were a blessing to our school! The students were so excited that they could choose their own adventure.  Every child got to choose between two units!  We had a wonderful year! Well after last year we had to look at what we did, because we didn’t want to offer the same choices.  Plus new and exciting fitness opportunities seem to happen every year, why would you want to do the same thing!  We want to stay now and hip and exciting, because that’s what kids want!

Here were our unit choices then for this year 2011-2012

Merton Physical Education Unit Choices 2011-2012

Wow! Did we ever get some excitement from our students!  They loved the options for 2011-2012.  I was ready to start the new year!!

Our Findings!

So many of our students and our parents have been so excited and supportive of our major changes that we implemented!  We have never had a negative comment and are always thanked by our parents and students!  Just by giving a choice and having an option, your students feel strong and open to trying something new and working hard!  Behavior issues are at a minimum, because everyone wants to be in the unit they chose!

More kids are getting fit!  With fitness options there is much more time to focus on elevating heart rate and spending time in different fitness zones!  The students that are involved in team sports are now more active, because everyone who is playing really wants to be there and play hard!  This means we can teach more specific skills and play more games at a higher level!  This program benefits every student!

Kids want to try something different!  Almost every non traditional activity has had more interest with our students! Wow!  I would have never guessed that!  There is so much interest (usually 60%-75%) in the non traditional activities.  I am so glad we can offer those to our students!  I have also found out that those kids that don’t excel in the traditional sports can really challenge themselves in the individual fitness activities! It’s been amazing to watch!

Here is the best part!  I am so passionate and enthusiastic about what we are doing it has elevated my teaching!  Everyday is new to me! Everyday is exciting and I am always looking for new challenges for myself and my students!  We are learning together everyday!  What an exciting adventure!

My Words to You

Please find a way to break down your “GYM” walls!   Try a new fitness activity or try not holding a physical education class in your gym! Find a new location to teach your students and find a new way to teach to them!  Throw out your old lesson plans!  It’s exciting for you and for them! You will be amazed at how your relationships change with your students!  I know mine will last forever!  Make an impact!!!!

Little Theatre

Here is our Little Theatre.  It’s great for many activities like yoga, fitness, pilates, dance, and circuits! Find a alternate location where you can do different things

Cafeteria

Our cafeteria was great for wrestling, speed quickness and agility, circuits, and more!

Outdoor Courts

Great space for winter games and activities.  We have done broom ball and will be doing some snowshoeing activities here!

New Activities for me

Here is a list of some of the new activities I have taught!  It has been the most exciting two years of teaching! Look it over and please find a way to incorporate something new and exciting for you and your students!

Lacrosse

Archery

Yoga

Pilaties

Boot Camp

Geocaching

Broomball

Bowling

Strength Training

Biking

Snowshoeing

Dodgeball

Speed, Quickness & Agility

Track and Field

Aerobic Dance

Cooperative Games

Wrestling

Fitness Stations

Curling

What will you do that’s new? Let me know in the comments!

Geocaching at Merton School

Geocaching at Merton Intermediate School

Merton School

Here is a short video of what we have been doing at Merton Schools with Geocaching. I am actually just enjoying using my MacBook Pro and love creating videos through iMovie! Lots of fun! Check out what we have been doing!

This is how it was done

Geocaching is off to a great start at Merton school.  Our 7th and 8th graders have been activly Geocaching for two class periods now.  Our students had a choice between geocaching and field hockey.  I was amazed when over 70% of kids chose geocaching over field hockey. My students explained to me that they were excited to try something new, use their technology, work with a group, and participate in a fun competition!  I was excited and nervous to start this unit because there were many variablies I could not control (what gps devices my students bring, where to hide all my geocaches, and how to deliver the waypoints to them).  After one week of geocaching all my nerves are calm and the students are activily caching on school grounds!  What an exciting time!

Day #1 Geocaching

The first class was an introducation to geocaching and I created a powerpoint to give the kids an understanding of what it is and how we are going to do it.  I was focusing on the etiquette involved in geocaching, so they understood how much effort I was putting into every class and I really needed them to understand how to respect the equipment. Here was the powerpoint I showed my students.

Geocaching Powerpoint

Treasure Hunt!!  We finished the first day off with a treasure hunt.  I hid 6 geocaches around the inside of the school and gave my students clues to finding them.  The clues were easy, but finding the caches were hard!  My students had a great time doing the treasure hunt.  They were so excited I had to really watch them and control them so they were not running in the halls!  I love seeing that excitement in 7th and 8th graders 🙂

Watch a slideshow below to see where my caches were hidden!

Day #2

Outdoor Geocaching

I set up 8 geocaches outside on school grounds.  The locations were chose and set by a program on my HTC EVO smartphone.  I used the application called waypoint pro.  This works good because I can set my waypoints and email them to myself as I walk to the next waypoint!  After that I entered all the waypoints into a excel sheet and added geocaching groups.  I set up a team coordinate geocaching sheet so all teams were going to different caches at different times!  Here is the file.

Team Coordinate Sheet

I explained how to enter coordinates into each device and gave them their coordinate sheet and let them go.  Each cache contained many stickers and I had them stick the stickers on their coordinate sheet, so I knew they were traveling to their geocaches in the correct order.  Here are some examples of where I hid the caches!

This slideshow requires JavaScript.

Devices:

Android Phone

Android Smartphone

These phones worked the best.  We used the application c:geo available for the android smartphone.  This application was free and let us plug in the coordinates of the waypoints that I gave my studnents.  The compass then pops up and shows them what direction to travel and how far away it is from their current location.

IPod & IPhone

IPhone & Ipod

Coming into this unit I was unsure how to use these devices, but thanks to a student of mine they have been a great choice to use!  My student suggested that we use a application called MotionX gps which costs $2.99 on the iTunes store.  I should have thought of this, but I was looking for free apps.  After I saw how many kids had iPods I knew this was the way to go.  We have wireless access around the school grounds, so even iPods work great!  When my students punch in the coordinates you see a satellite image of our school grounds and there is a line directing which path you should take to the coordinates.  They get a great idea of the location of the cache.  Very cool!

GPS Device

Handheld GPS Device

There was a short learning curve for me with this device.  Most kids didn’t know how to use them.  These groups first had to figure out how to change the coordinates into the ddd.ddddd format I was using.  After we figured that out and practiced a little, then these devices worked great!  It was fun learning and taking chances with these groups!

GPS Car Device

GPS Car Device

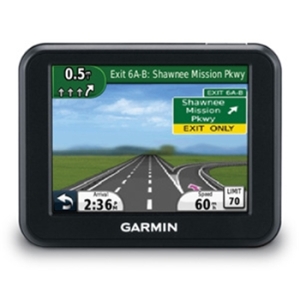
This was the toughest to use.  I found a youtube video to show me how to use this for geocaching and that helped a lot, but it was not as easy to navigate to a geocache as other devices.  Once groups got the idea they moved pretty well.  This was a challenge, but also a good choice because a lot of families have them!

I can’t wait to hide more caches and see how my students progress in this new adventure!

Geocaching in Physical Education

Geocaching

Teaching parents and students to begin Geocaching

Well I am ready to begin a new adventure!  I am sure it will be an exciting time for my students and myself!  I am ready to give this a try and I can tell my students are too!  The unit choice was between field hockey and geocaching.  A vast majortiy of studnets (75% on avg in each class) chose geocaching.  Wow!  I would have never expected that!  Then began my preperations.  Trying to figure out how I could keep 30+ kids active and learning for 5 or more 45 min class periods!  Here’s the plan for next week!

I just sent out an email blast and a message to all of our parents and students, because I will need their help.  We are going to be working in groups of 4 or 5, so we don’t need to have too many GPS devices and I won’t have to hide too many caches!  We have no supplies for this as of right now.  I am asking that parents and students bring in the GPS enabled devices so they are empowered and excited to use their current technology!  We are trying all optoins!

Option #1

Option #2

Option #3

I am going to keep the geocaching as simple as possible.  My plan for the unit is to hide 8 dfferent caches everyday around our school grounds.  We have quite a bit of land, so I am going to make it as spread out as possible to get the most activity for our students.  I will give each group different coordinates to start at.  From there they will find the rest of their caches in correct order.  This was the easiest way for me to give them the coordinates.  At each cache they will have to collect a stamp and stamp their caches in the correct order.

 I used the droid app waypoint pro to mark my waypoints and email them to myself.  I will have students manually enter in the coordinates in their GPS enabled device.  Here is some information I used to send the parents and students to practice before our first geocaching lesson.

Here is a quick video on What is Geocaching?
My Screen-o-matic about the basics of navigating www.geocaching.com
I am nervous and excited about taking the next step and teaching, but I know it will go great because my students and I are in a partnership with their learning!  We will learn together during this unit!  I  truly appreciate any of your thoughts and insight on any of this!  Thanks!

Merton Fitness Testing

Be Fit!

Well fitness testing is almost done for another year.  I am happy with how everything went this year, but I am always looking to make things better.  I will give you an idea of what we do to keep our kids motivated at Merton Intermedite School, and I would like you to comment or critique on what we do.

First we give our students three different options for testing their physical fitness ability.  Students can attempt to get into the presidnetial, national, or healthy fitness zone.  Presidential fitness testing is the toughest scores or standards to get (have to beat 85% of the U.S. their age and gender)

Presidential Standards

We test for the presidential standrds because there are many fit students in our school who are driven by numbers and accomplishing their goals of beating challenging scores!  This is a great test for that!

In the Presidents Challenge you can also let students go for the national patch.  This is the same test as the presidential patch, but the standards are lower (you must beat 50% of the U.S. same age and gender) Here are the standards.

National Standards

Again this test is great, because you administer the same fitness tests but it gives those studnets who fall below in one or two of the presidential fitness testing standards a goal to continue to strive for.  This is a more realistic test for many students to shoot for, so it gives the hope for accomplishing a major fitness goal in their life!  That is so important!

During our physical fitness testing, we also grade the students on making it into the healthy fitness zone.  This is done by using the numbers or standards put out by the Fitnessgram test.  You will have to click on the link below to see the standards for the fitnessgram tests.  This test is great, because it is not an “elite” test.  A very high percentage of studnets can make it into the healthy fitness zone, which will increase the self-esteem of the student! 

Fitnessgram StandardsTable

The fitnessgram test has a really neat program that you can easily keep track of students fitness levels, which is a really cool option click here to see more about it.  This makes the Fitnessgram test great, because when students see their progress they will continue to make gains in their fitness levels.  It also makes goal setting and tracking student progress easier for the teacher and studnet.

The presidents challenge will be coming out with a form of online tracking software soon.  Click here to see more information about what the Presidents Challenge will do in early 2011.

Our goal at Merton is to give everyone a chance to be successful and see progress in their fitness levels.  I believe we offer enough tests where everyone can be successful.  We need to get better at tracking progress over time and I am looking into using either of the tracking tools or making my own Merton Fitness Passports to hand out at graduation!